

Arrow Fletching Basics
Fletching your own arrows is a great way to add a personal touch to your archery setup. It is generally a very simple task, that if done correctly and carefully, will reward you with arrows that shoot as good as they look. The trick is to keep your vanes on and this is all done with careful prep work and good equipment. I am going to walk you through the basic steps of fletching your own arrows so the vanes stick and they shoot great for the whole season.
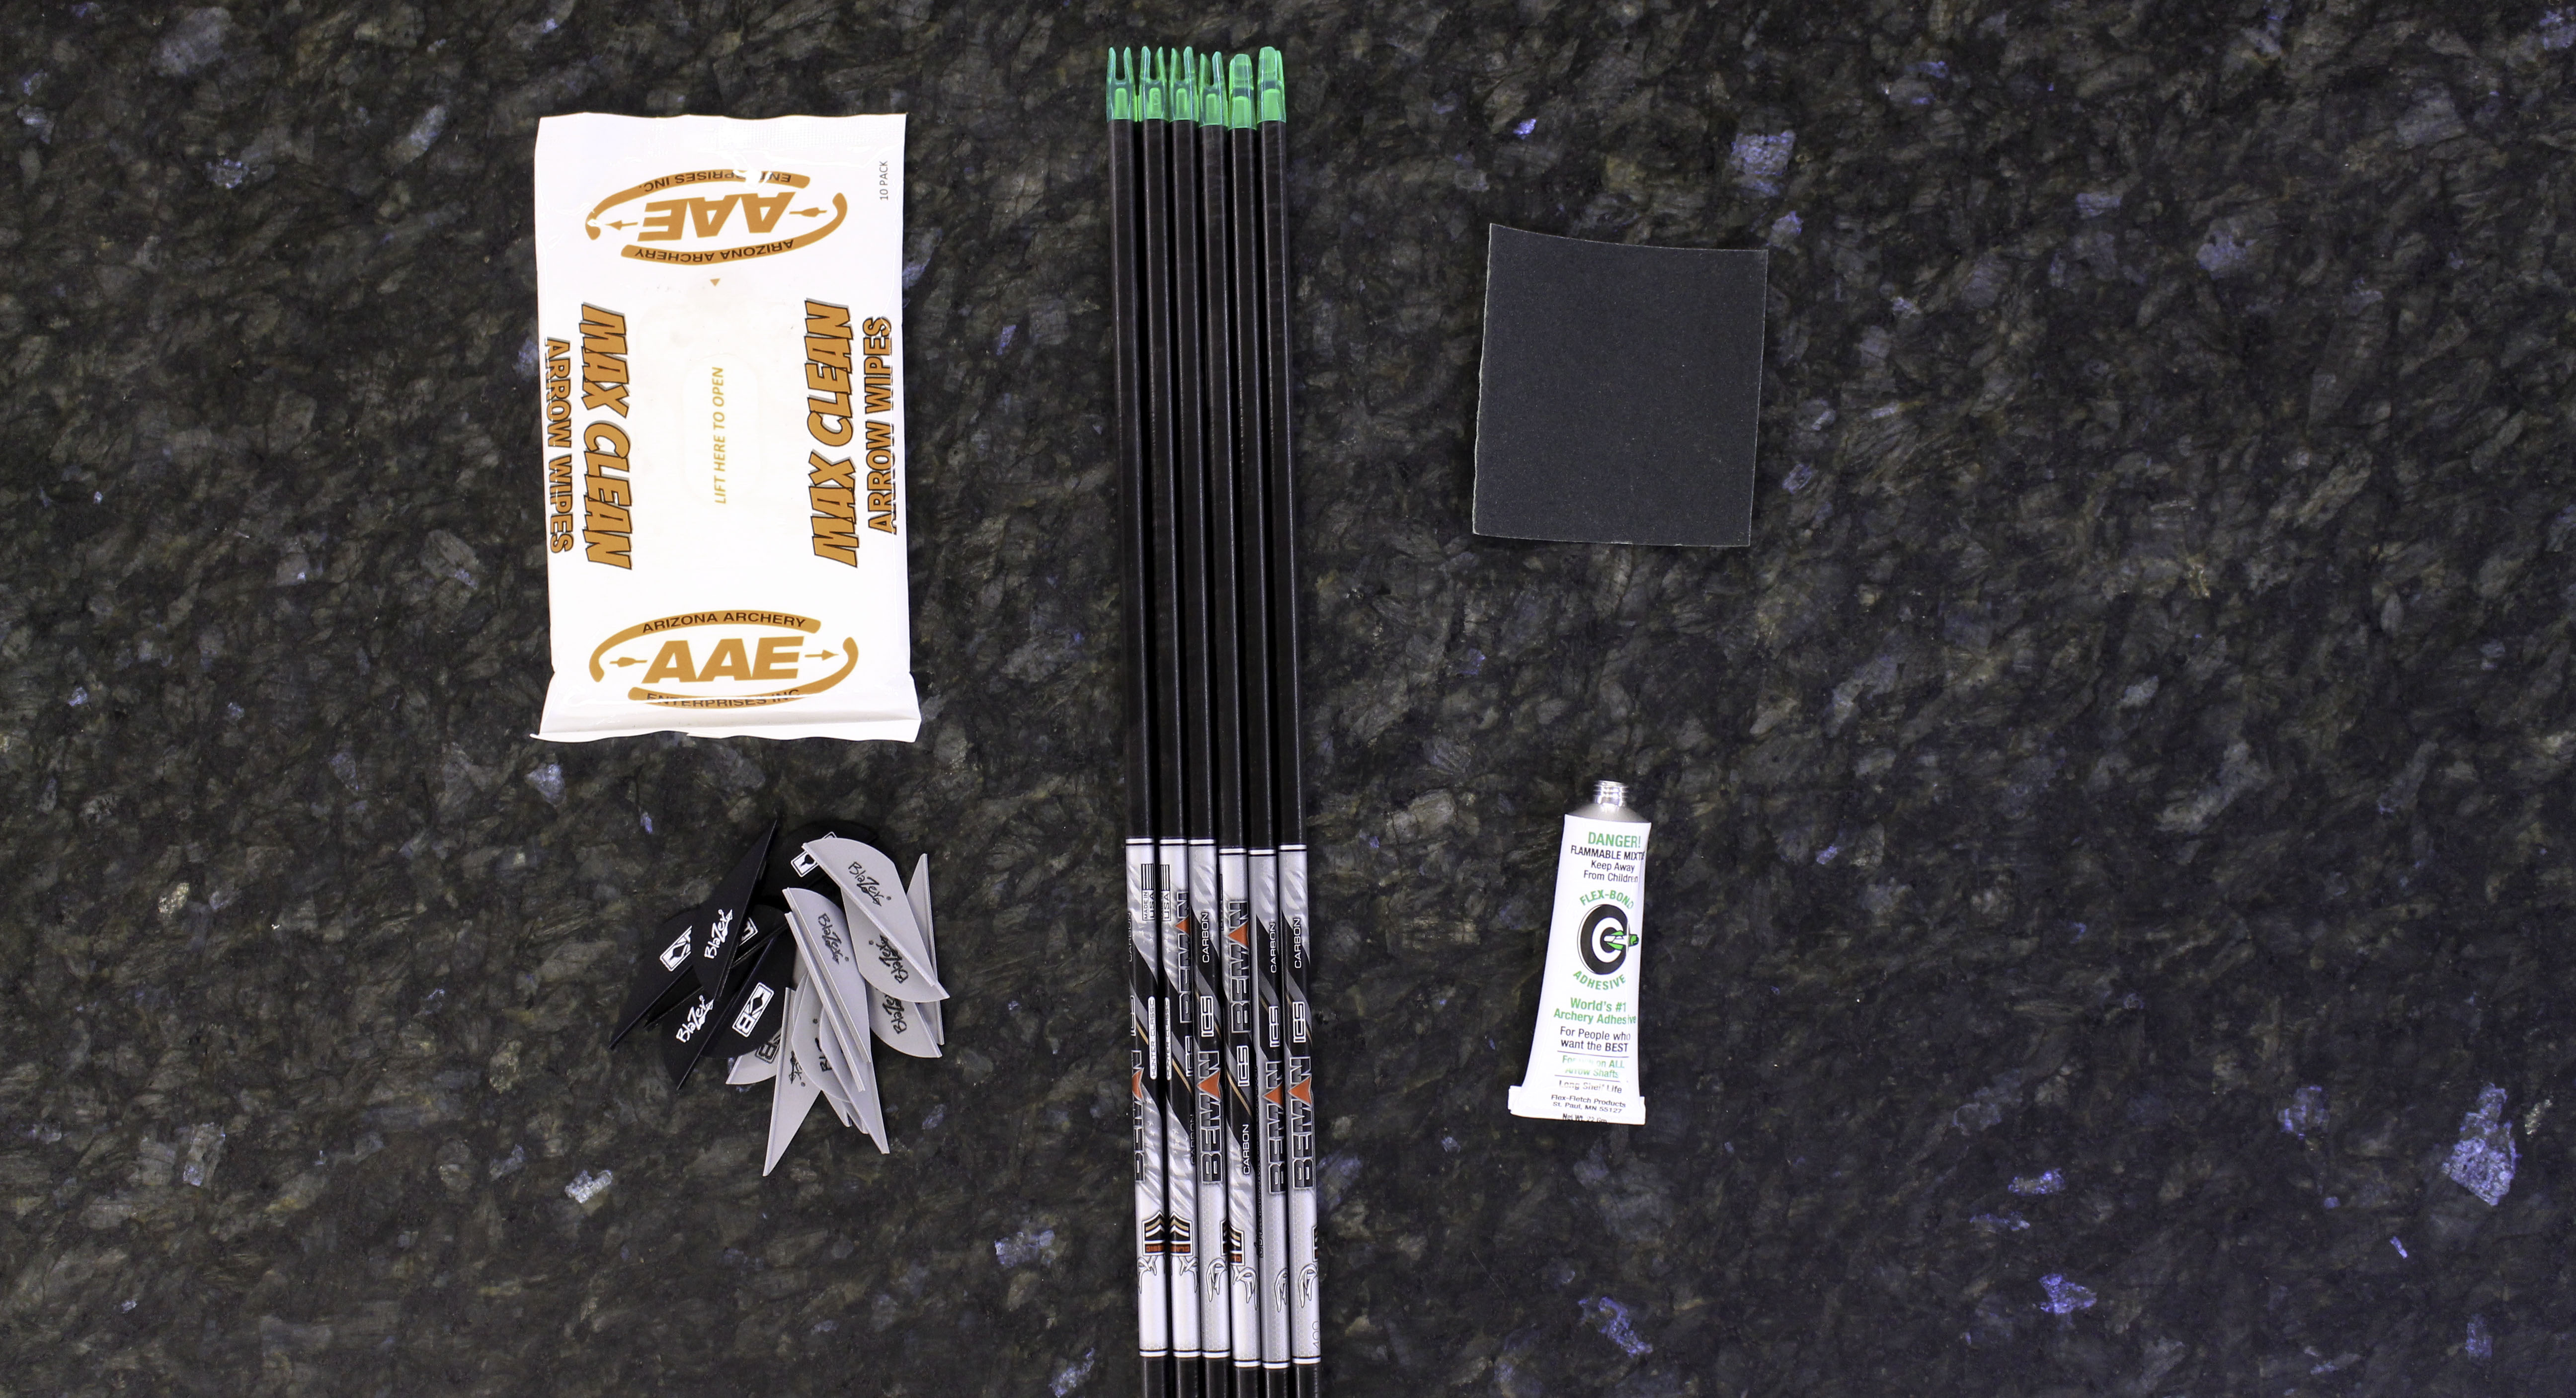
First you need the right tools:
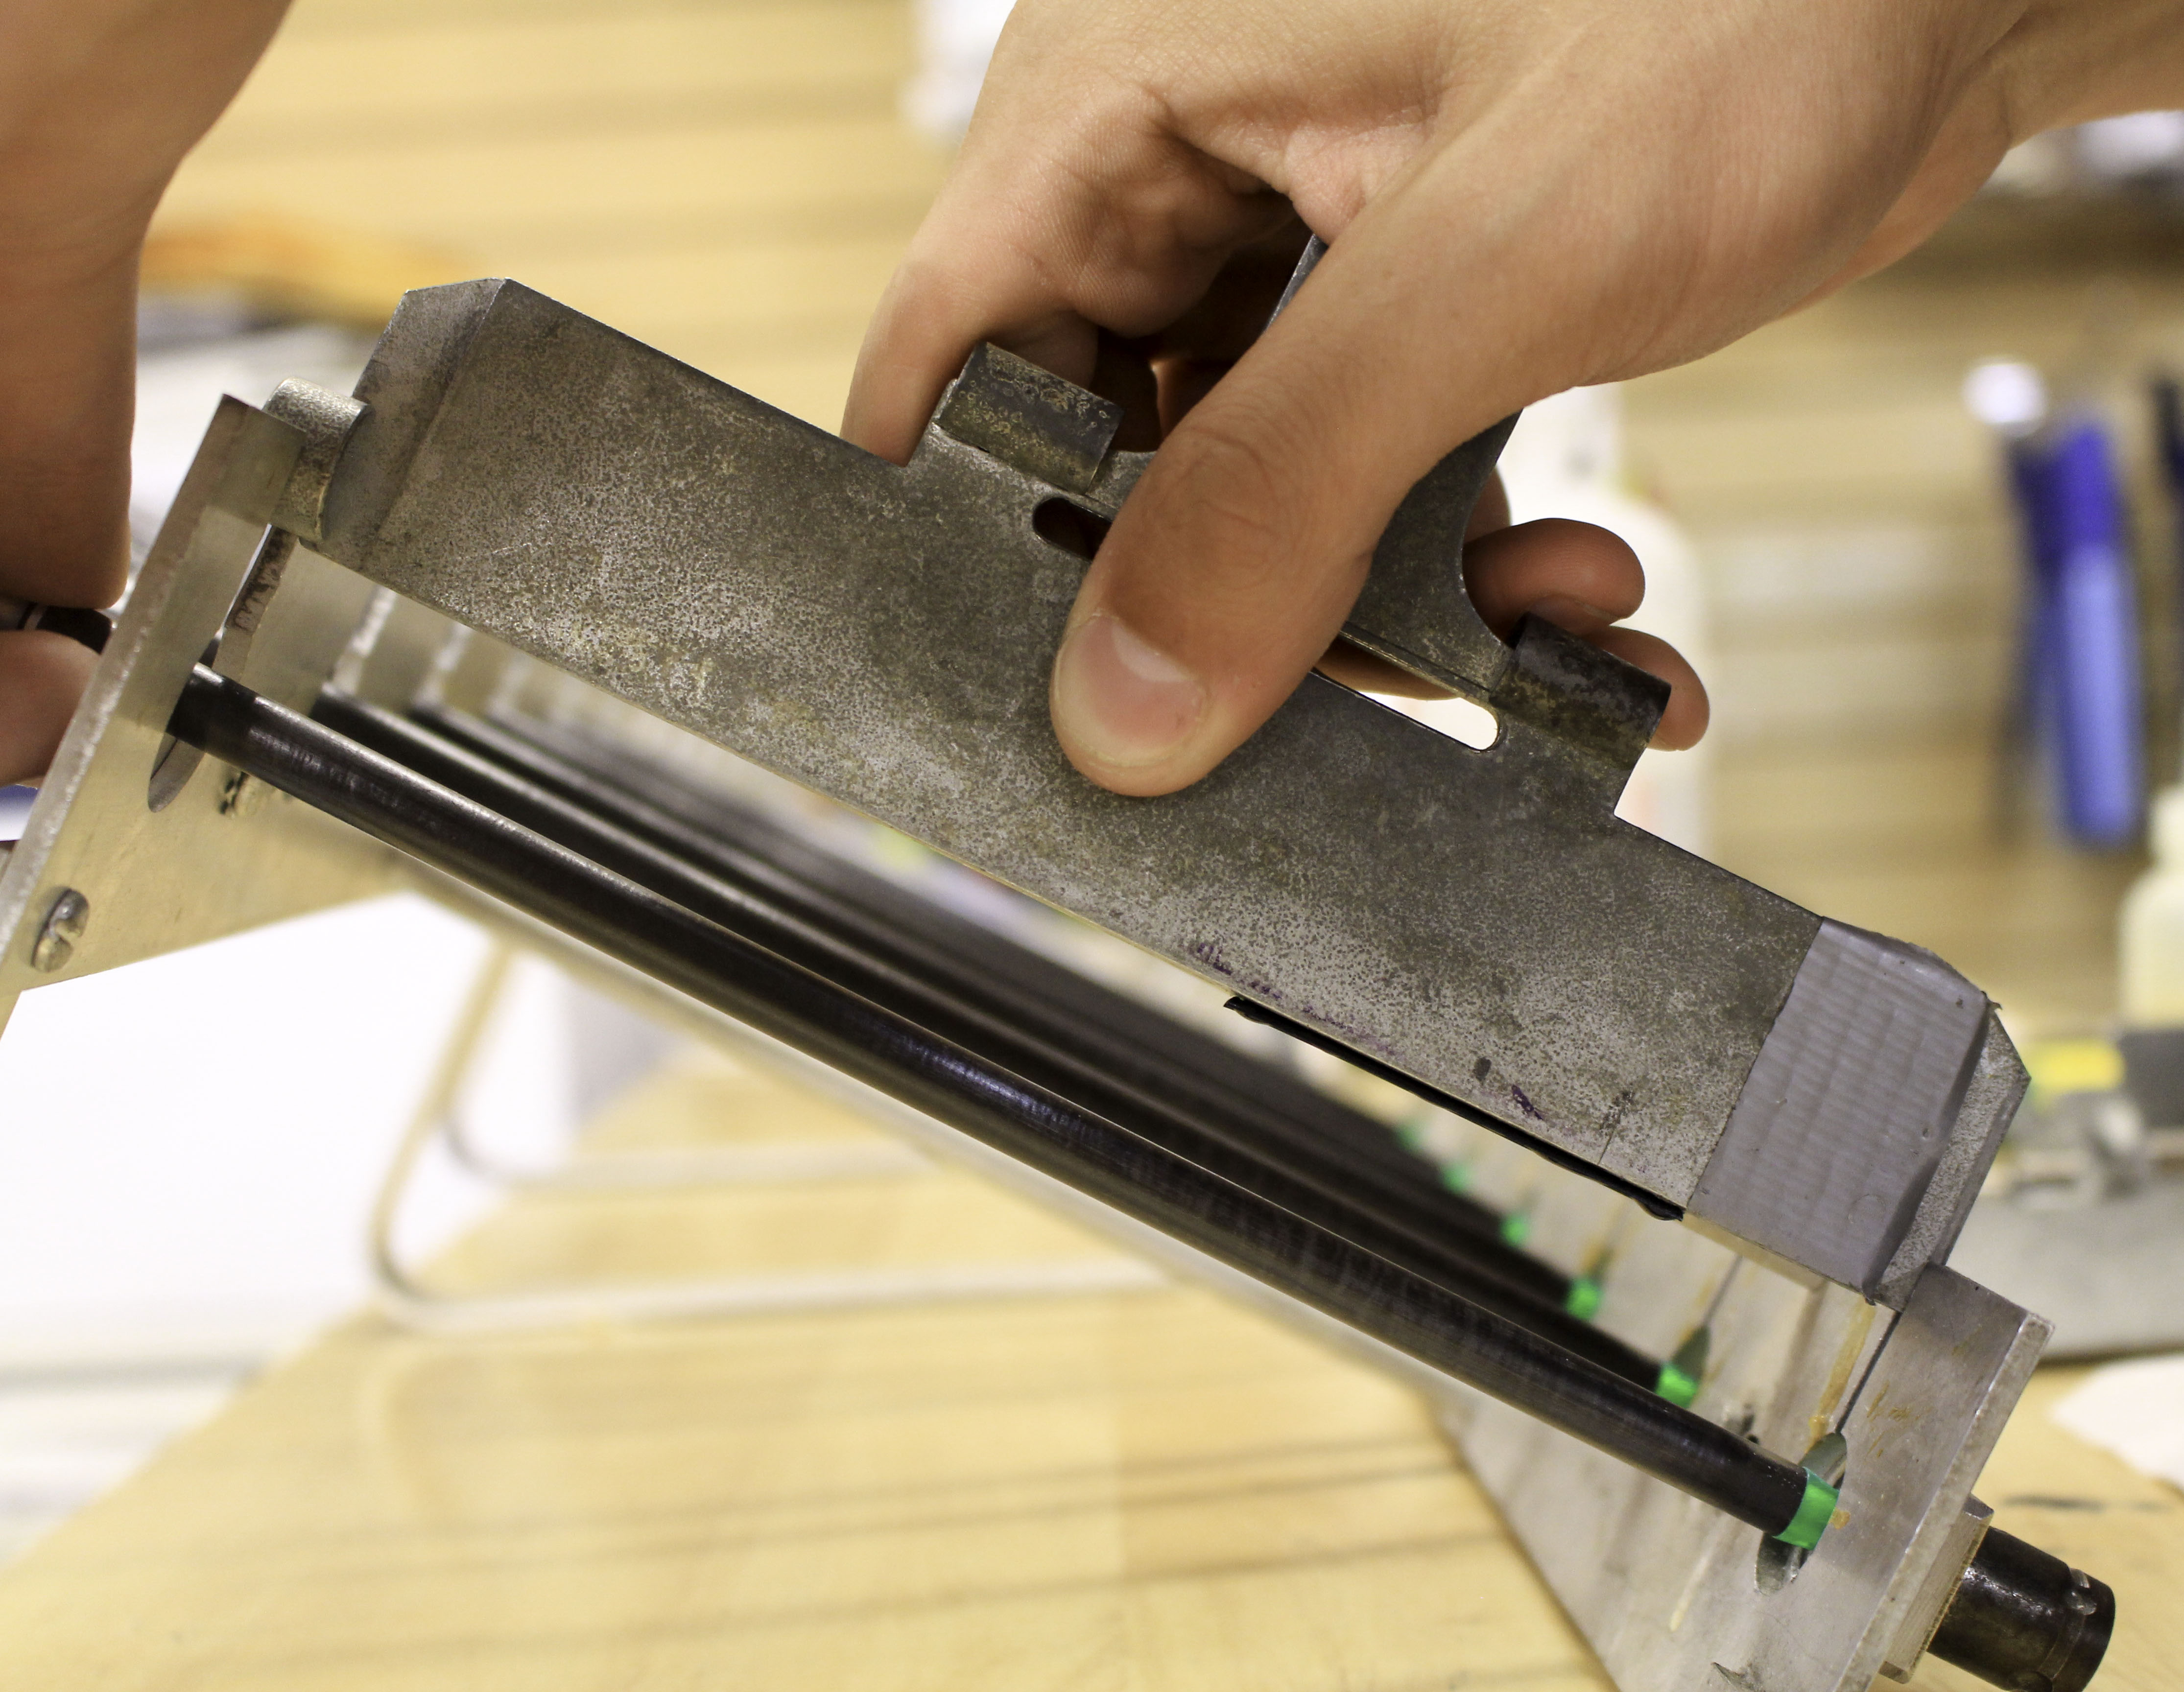
- 1)Fletching Jigs: There are two main types of fletching jigs, ones that fletch one vane or feather at a time and ones that put all 3 vanes on at the same time. For the novice DIY arrow fletcher I believe that single clamp jigs like those from Jojan and Bitzenberger do the best job. They keep things simple and allow you to repair single vanes easily if needed.
- 2)Sand Paper: Use a fine grit like 400 for best results
- 3)Cleaning Solution: Many manufacturers making cleaning wipes like the Max Clean Wipes from AAE. You can also use 99% Isopropanol that you buy at your local pharmacy.
- 4)Fletching Glue: The main two types here are fast set and slower setting glues. My preference is a slower setting glue like Flex Bond from Flex Fletch which I have found works on a variety of fletching types and arrow shafts.
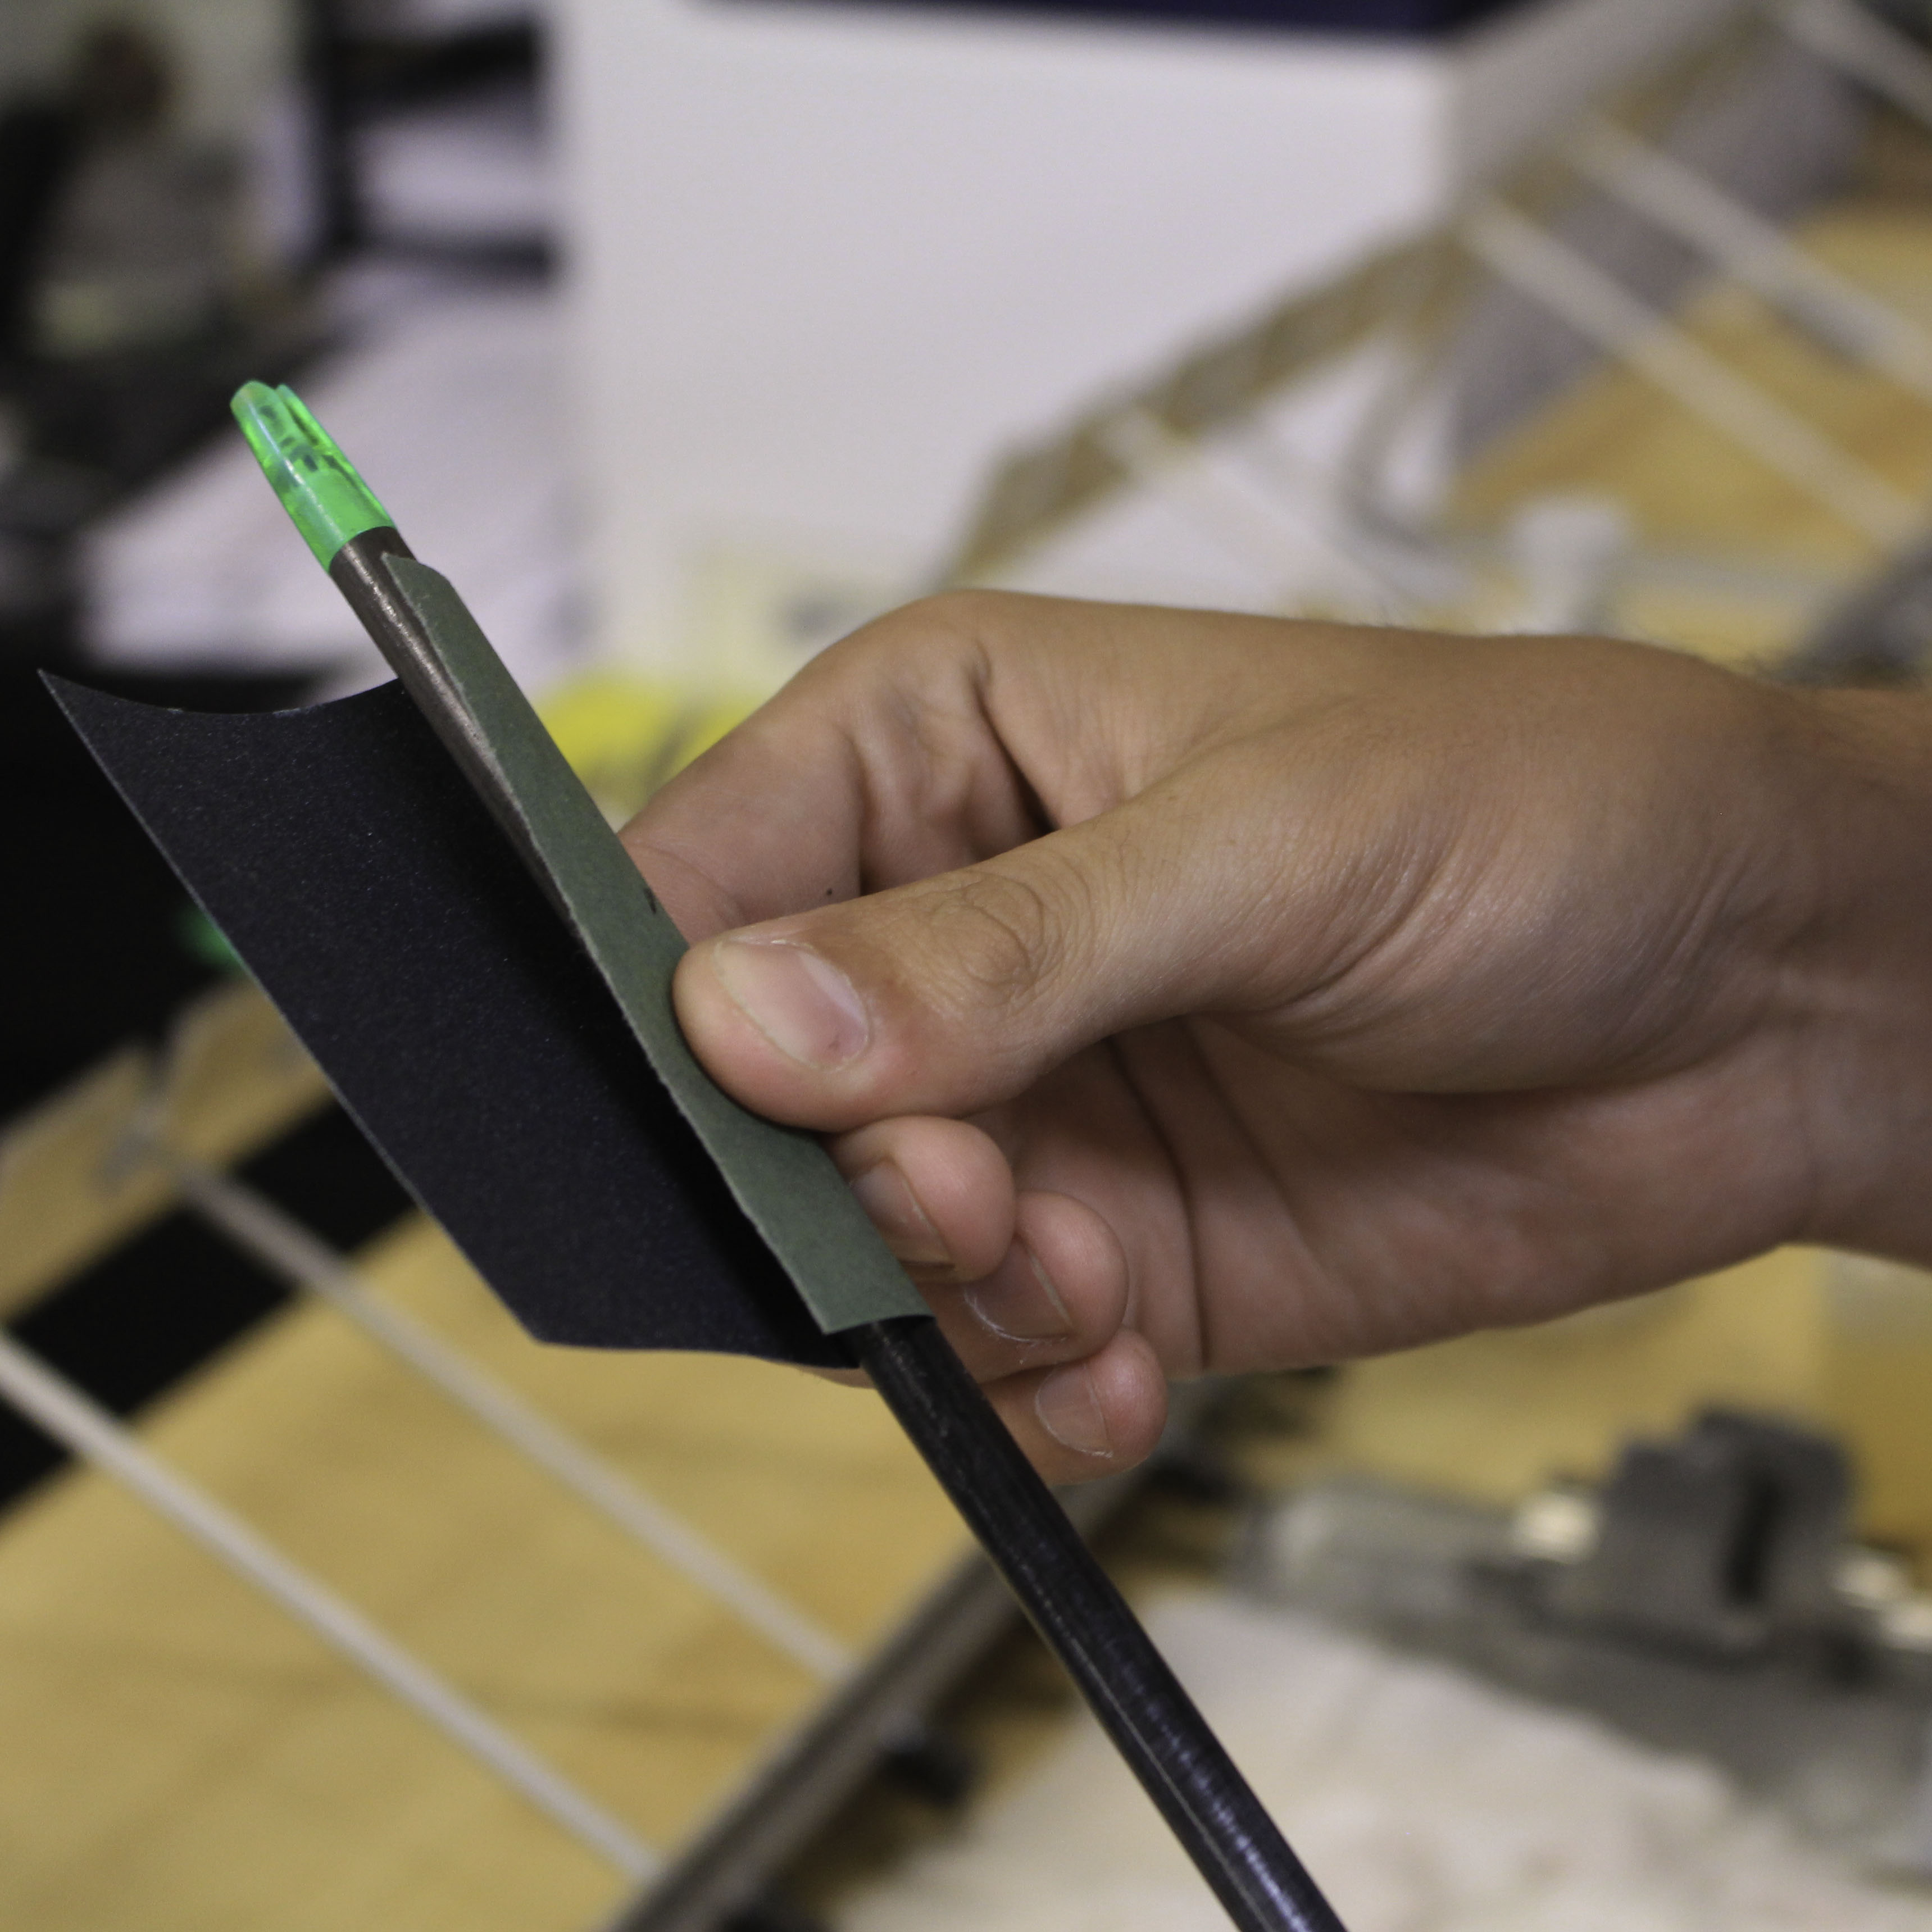
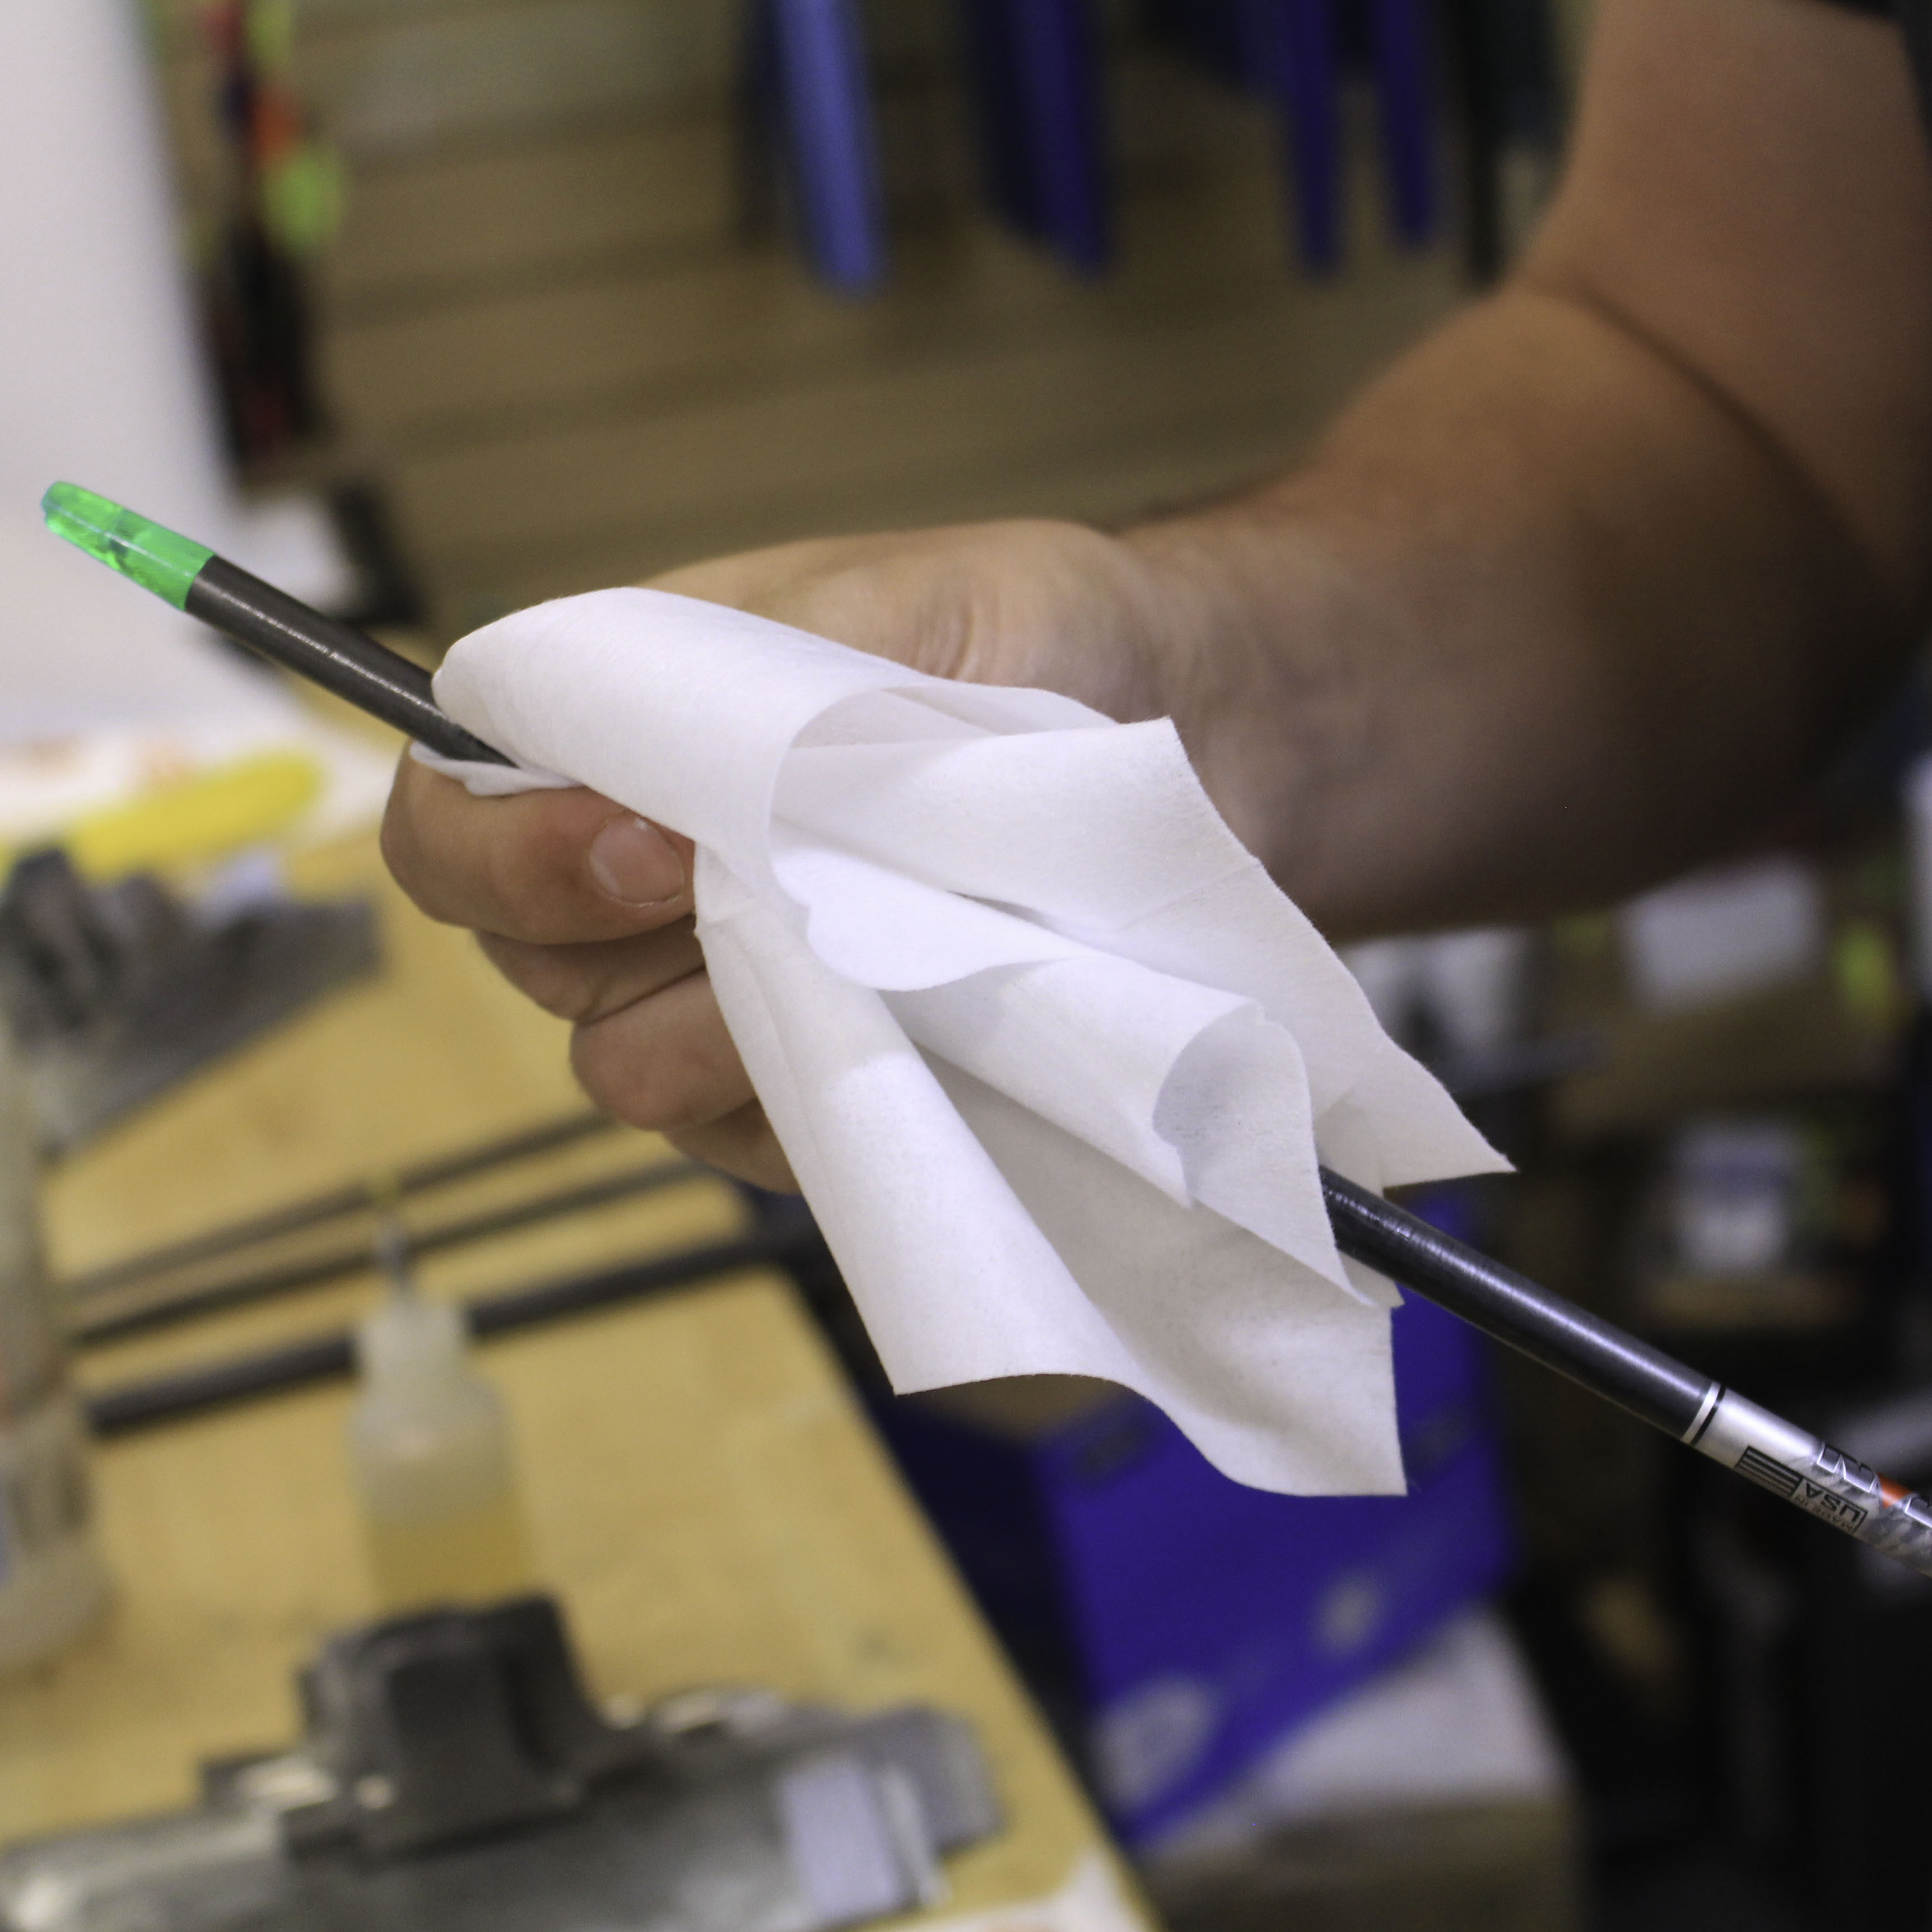
Step One: Shaft Prep
This is the most important step in arrow fletching, take your time and be thorough with cleaning. First take the sand paper and scuff the shaft area where you will be attaching the fletching too. Next take the cleaning cloths or isopropanol soaked paper towel and clean the shaft area until it is “squeaky clean”, no joke the arrow needs to be squeaking. If you are unsure if you have cleaned the arrow enough clean it more, it cannot be too clean. Once you have completed the cleaning make sure you do not touch the area or place it on a dirty surface. I usually try to have the end of the arrow hang over the edge of the counter or table where I am doing the fletching of the arrows.
|
|
Step Two: Fletch Prep
Often overlooked, fletch prep is always a good idea even if the vanes you are using don’t require it. It can be as simple as wiping the vanes with the cleaning solution or it can involve lightly sanding the vanes and cleaning them with something as strong as acetone. How much prep and cleaning is needed really depends on the type of fletching that you are using, always check the manufacturer's recommendations and when in doubt ask your local pro.

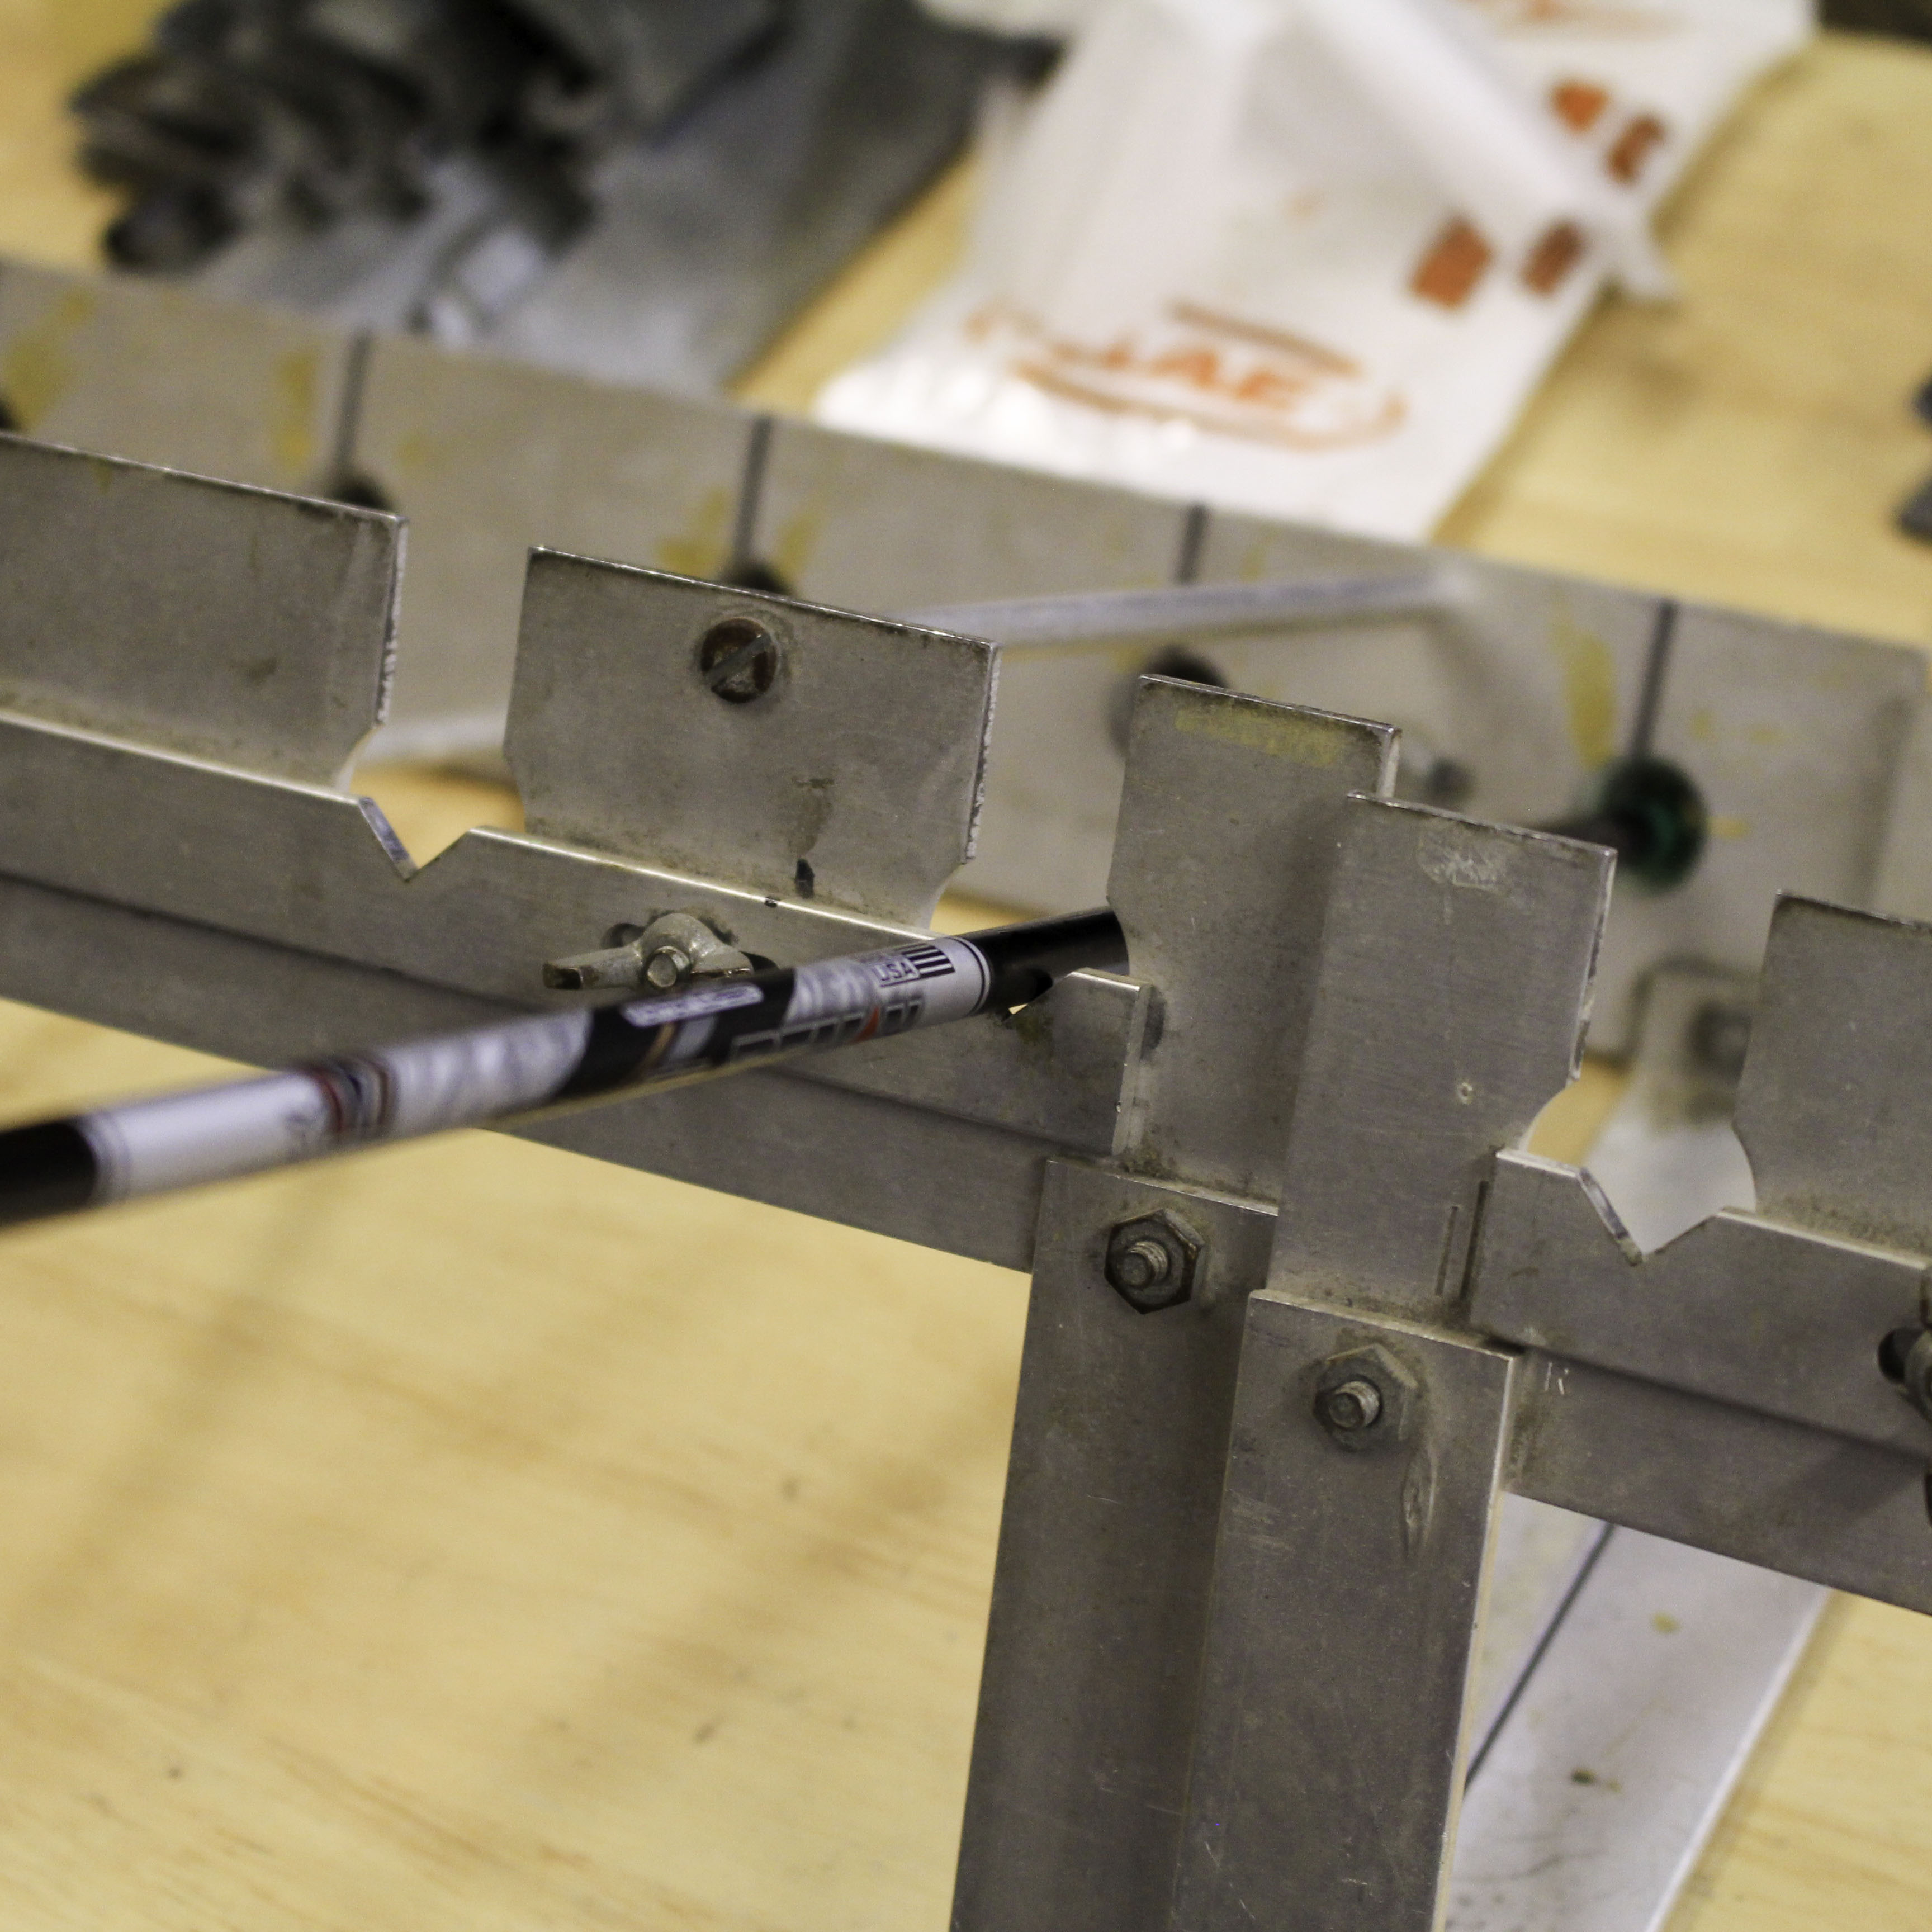
Step 3: Glue the Fletching
Before you place the fletching in your clamp you will want to mark off a spot of the clamp that you can align the back of the vane with, this will ensure that all the vanes all correctly aligned on the shaft. Next place your vane in the clamp and align it with the mark you made, if you are using the fast set glue place 4 or 5 drops on the vane and spread the glue evenly along the vane with the end of the glue bottle. Place the vane firmly into the clamp and hold down for 10-15 seconds, after that remove the clamp from the vane and do the next fletch. If you are using the slow set glue run a bead of glue down the entire length of the fletching then place the clamp on the arrow shaft and leave for 15 to 30 minutes. Repeat the process until all fletching are glued on the arrow shaft. When you are turning the arrow shafts in your jig make sure the shaft stays in the center of the jig, small diameter arrows especially have a tendency to move off center when rotated. Once all the vanes have been glued on inspect each arrow to make sure the fletching are properly aligned and evenly spaced around the arrow shaft you also want to clean off excess glue that seeped under the vanes. To finish the arrow place a small drop of glue on the front of each vane to help prevent fletching from being ripped off.
|
If you follow these simple steps, take your time, and thoroughly inspect your work along the way, you’ll be spending more time on the range and less time re-fletching arrows.
If you want to get started in fletching your own arrows click here.